


How to add a manual override switch for your diff cooler and make it activate based on oil temperature only, without cutting a single wire on your car
Recently I decided that it was time to change my diff oil. After a quick read around on this forum I discovered that several people had hot-wired their diff oil pumps in order to pump fresh oil into their diff casing, rather than feeding oil through the filler plug in the more conventional way. Also, in order to get as much of the old oil out as possible, it seemed to me like a reasonable idea to hot-wire the pump in order to purge the cooling loop when draining the diff oil.
I had a look in the workshop manual for info about how the diff cooler worked and I was surprised by what I found: when driving the diff oil cooler pump will only activate if the diff oil temperature is at or above 130c and the car is doing more than 75mph. Whilst I am sure Nissan had their reasons for this, I dont see why the pump shouldnt operate when the road speed is less than 75mph.
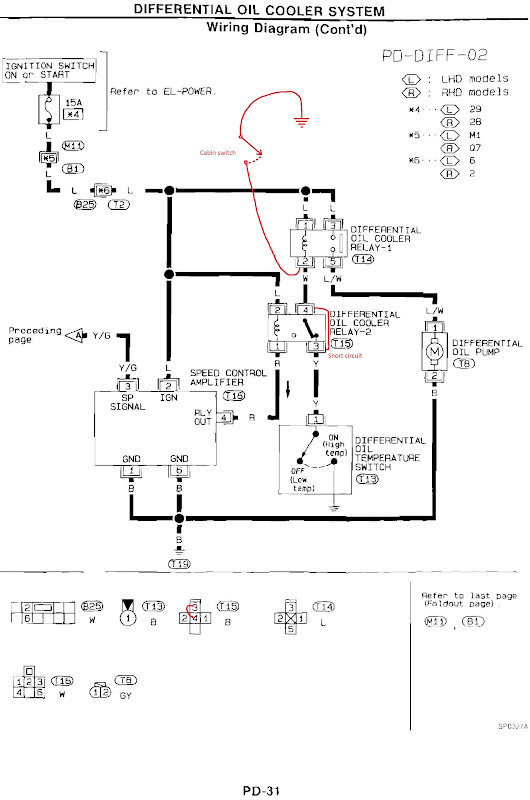
I therefore decided to install a manual switch in the cabin to act as an override. I started by looking at the diff cooler control system wiring diagram in the manual (page PD31) to work out how I could override the existing system whilst making the minimum of changes.
I should mention at this point that I dont work with electrics and my knowledge in this field is pretty basic, so the wiring diagram seemed pretty complicated at first glance. However, I had a read through the How to Read Wiring Diagrams section of the manual (pages GI9 to GI17) and it really helped explain what was being shown on page PD31.
After a bit of studying the diagram I came up with a very simple way to add a manual override switch for the diff cooler and remove the 75mph criteria so that the diff oil cooler will always come on when the oil temperature is above 130c, even if the override switch is off.
Here's what I ended up with (please excuse the mobile phone pics taken at night...):
Off:
On:
The Theory
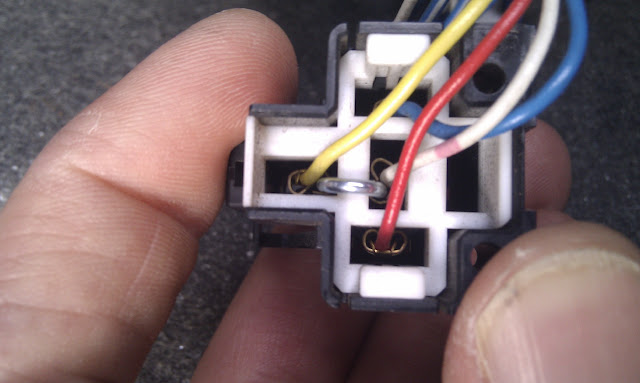
The following diagram shows the two modifications that I wanted to make. The one shows what is required to add the manual override switch; the other shows the very simple short-circuit that will remove the 75mph criteria.
[Note: It should be possible to click on any of the pictures in this thread to give you the option to view a higher resolution version.]
These modifications use the existing relays to activate the oil cooler pump, rather than having to hard wire a new circuit directly to the pump.
Parts and tools
- A switch*
- About 6 meters of wire (One 5m length and two 40cm lengths)
- An assortment of spade crimp connectors
- A wood staple
- Wire cutters
- Wire strippers
- Crimping tool (I used mole grips )
- Basic toolkit [Philips screw driver; 10mm socket, etc.]
- Claw pick-up/retrieval tool (helpful to have) [Like this: http://www.amazon.co.uk/600mm-FLEXIB.../dp/B00439FN06 or http://www.machinemart.co.uk/shop/pr...omotive-tools]
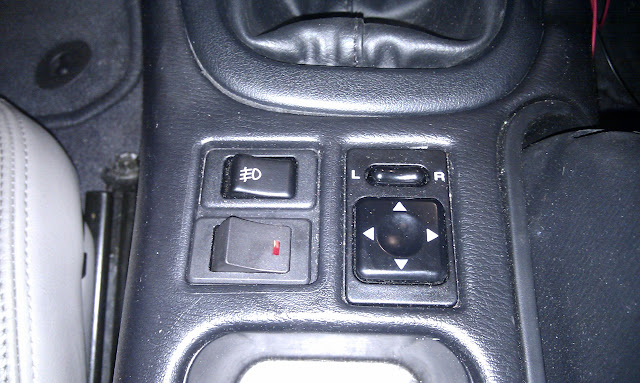
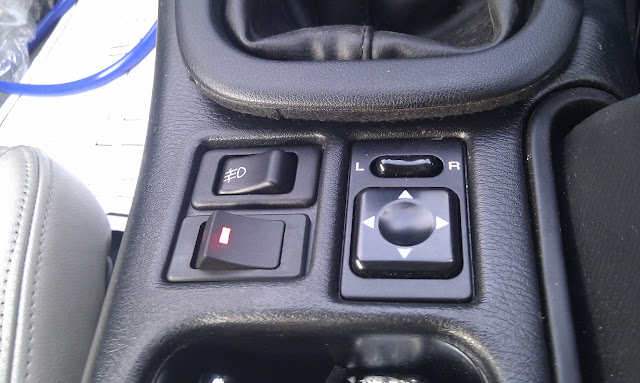
* I bought a switch off eBay to fit in the slot currently occupied by my coin holder, next to the front frog lights switch to act as the override switch. Here is a link to a similar switch:
http://cgi.ebay.co.uk/Off-Illuminate...item19be6a295d
Step by step guide
Step 1: Accessing the relays in the boot
Open the boot.
Remove the four screws that hold the CD changer in place; unplug and remove it.
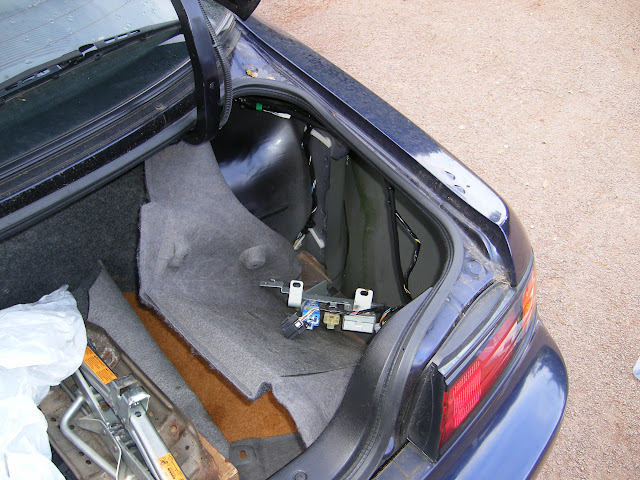
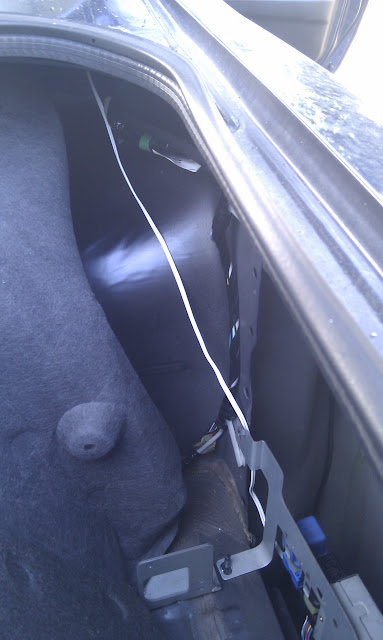
Remove the relevant trim clips and pull back the boot lining on the right hand side of the boot to reveal the two diff oil cooler relays and the speed control amplifier.
Remove the three screws that fix the bracket supporting the relays to the car.
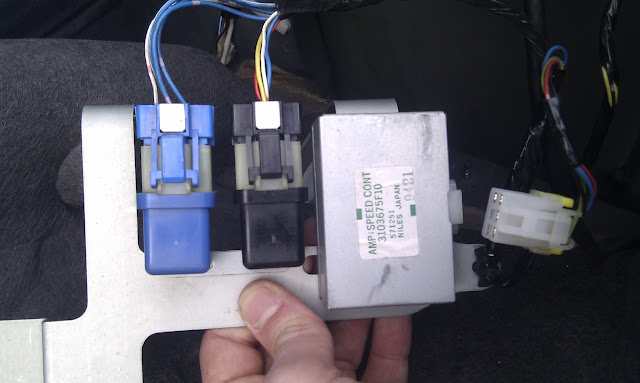
You should now have a situation that looks something like this:
Step 2 [Optional]: Testing to see if the oil cooler pump is seized
Before I started wiring up my manual override system, I thought it worth a moment to see whether my diff oil cooler pump was working, as it was unlikely to have ever come on in the 10 years since the car was made.
Testing is relatively straight forward, but does require jacking the back of the car up.
Firstly, unplug the speed control amplifier as such:
Then, jack the back of the car up. As you want to get to the back of the diff casing, the best jacking point to use is the diff casing itself, which the manual shows is a suitable place to raise the car:
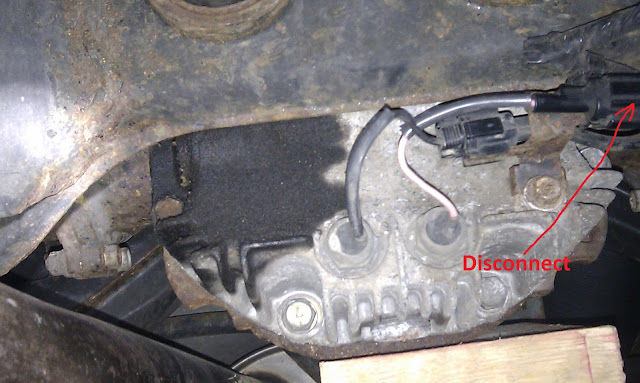
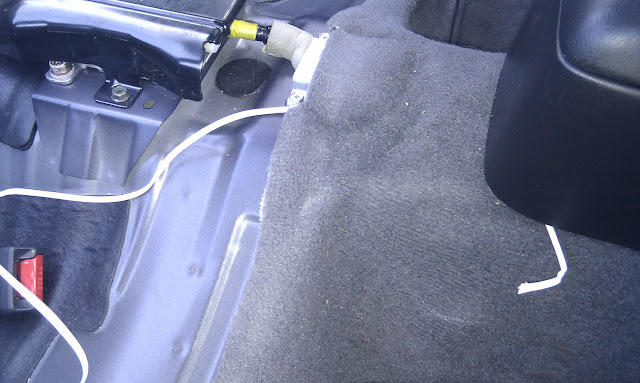
Next, unplug the connector [T13 in the manual] shown in the picture below:
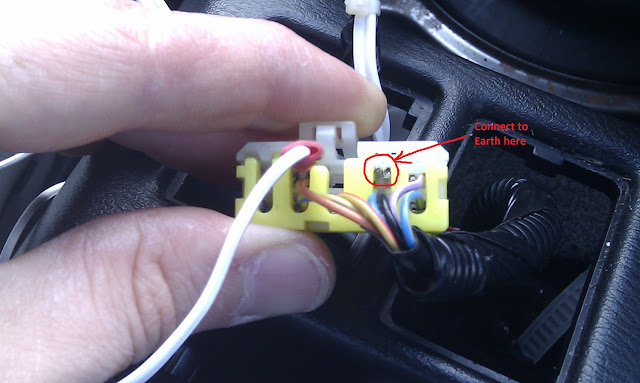
To test the diff oil pump, you need to switch the ignition on to position II and then make an earth connection to the metal terminal inside female harness connector. In theory, you should be able to connect it to the hard earthing point that sits about a foot away:
As soon as you make the connection, you should hear the pump fire up.
If you have trouble making an effective earth contact, I would recommend taking 2 minutes to attached one end of your long wire to the negative terminal of the battery, then running it under the car and attaching the other end to the metal terminal inside the female connector.
At this point, I was also curious to know whether the mythical diff oil temperature warning light on my car worked. Id read about this light before on the forum, but as it does not flash up when you switch the ignition on, I wasn't sure whether it even worked.
To test it, all you need to do is unplug the connector shown in the picture below [T12 in the manual] and attach your earthed wire to the metal terminal inside the male connector you have just disconnected.
When you have done this, have a look on your dashboard and you should see this light:
Once you have verified that your diff pump (and hopefully your diff oil warning light) work, turn the ignition off, lower the car and reconnect the speed control amplifier.


 Reply With Quote
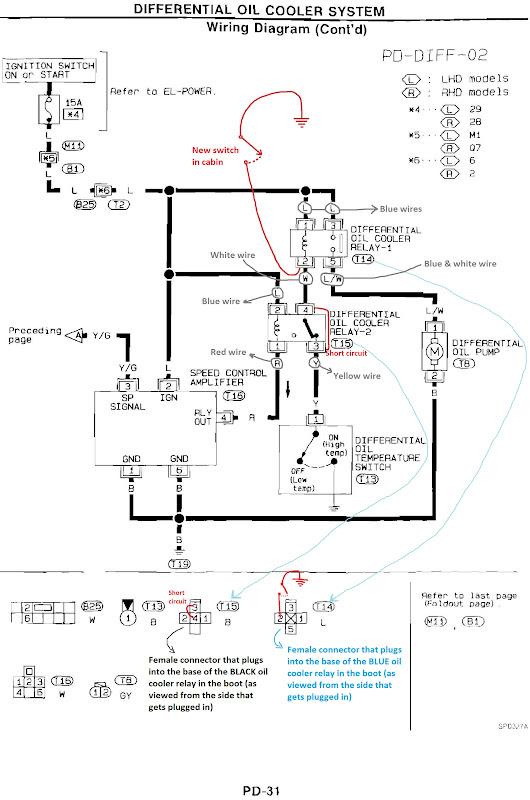


 Nice post, thanks!

