Page 5 of 11 FirstFirst ... 34567 ... LastLast
Results 81 to 100 of 220

Thread: S14 Trackslag, Rust Repairs, Cage, Brembo's, ABS and Aircon Delete

  1. #81
    Guest Jim_Auto's Avatar
    Join Date
    Aug 2008
    Location
    Cranbrook, Kent
    Posts
    372
    Rides
    0
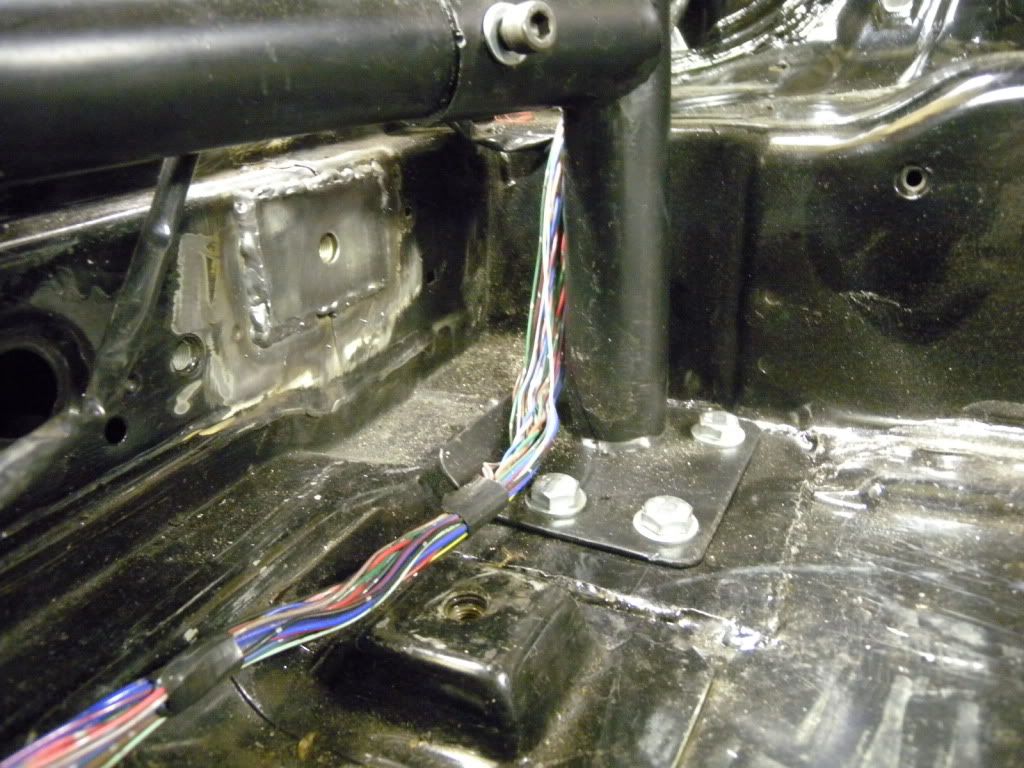
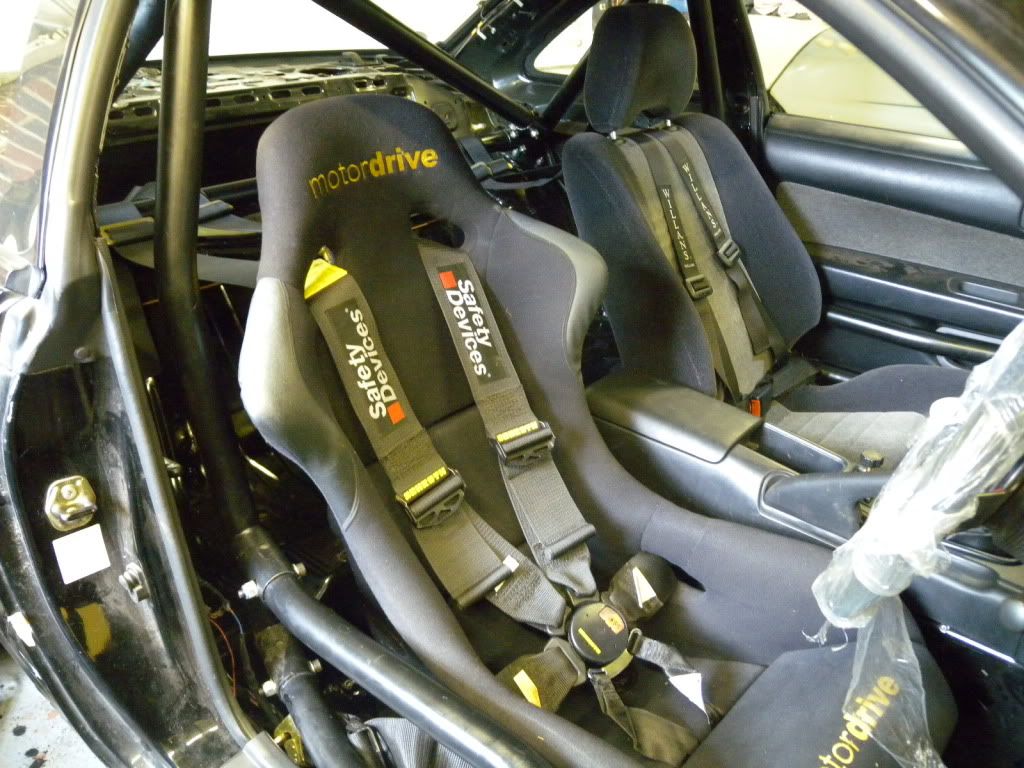
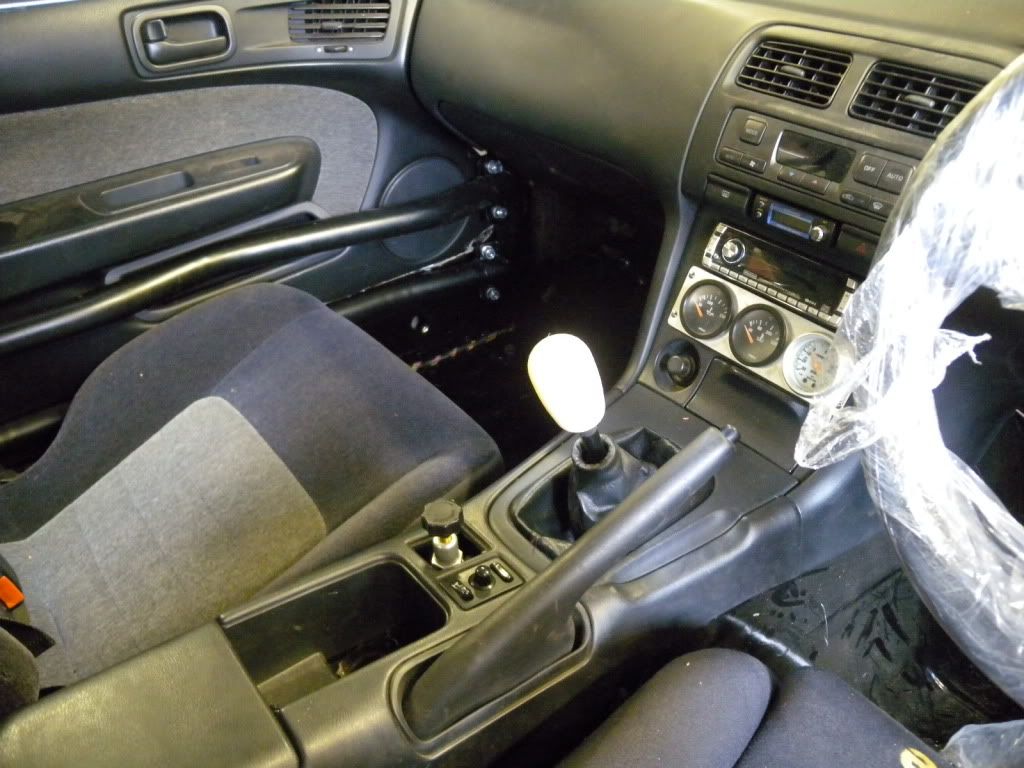
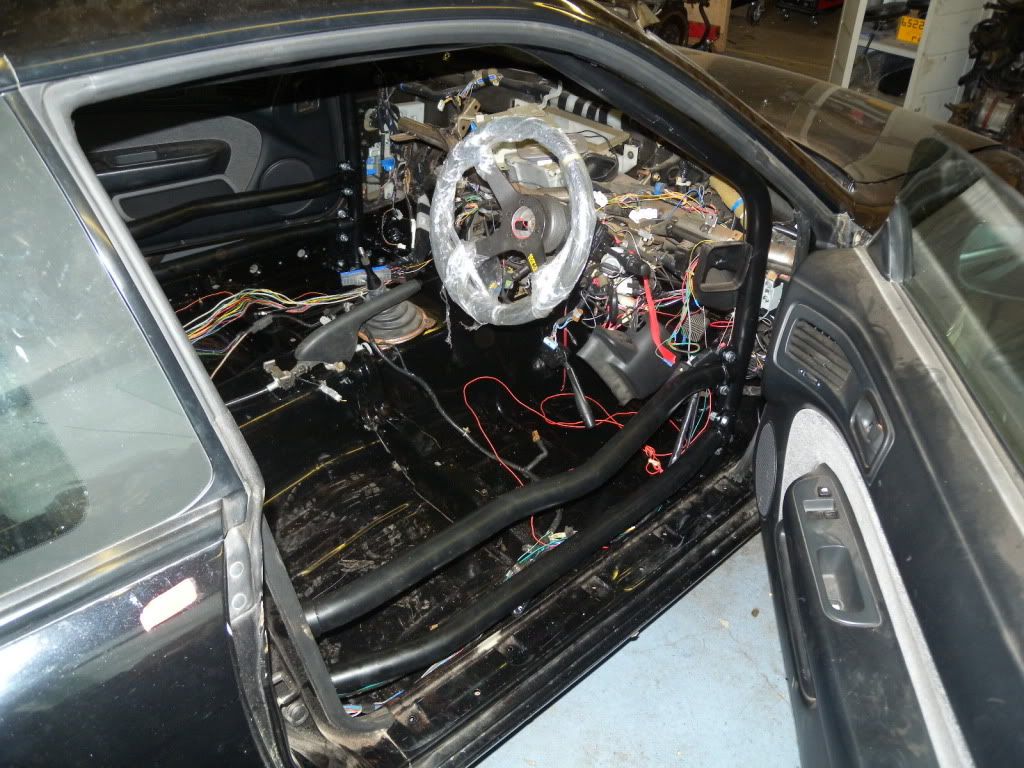
    The cage is now in!!!

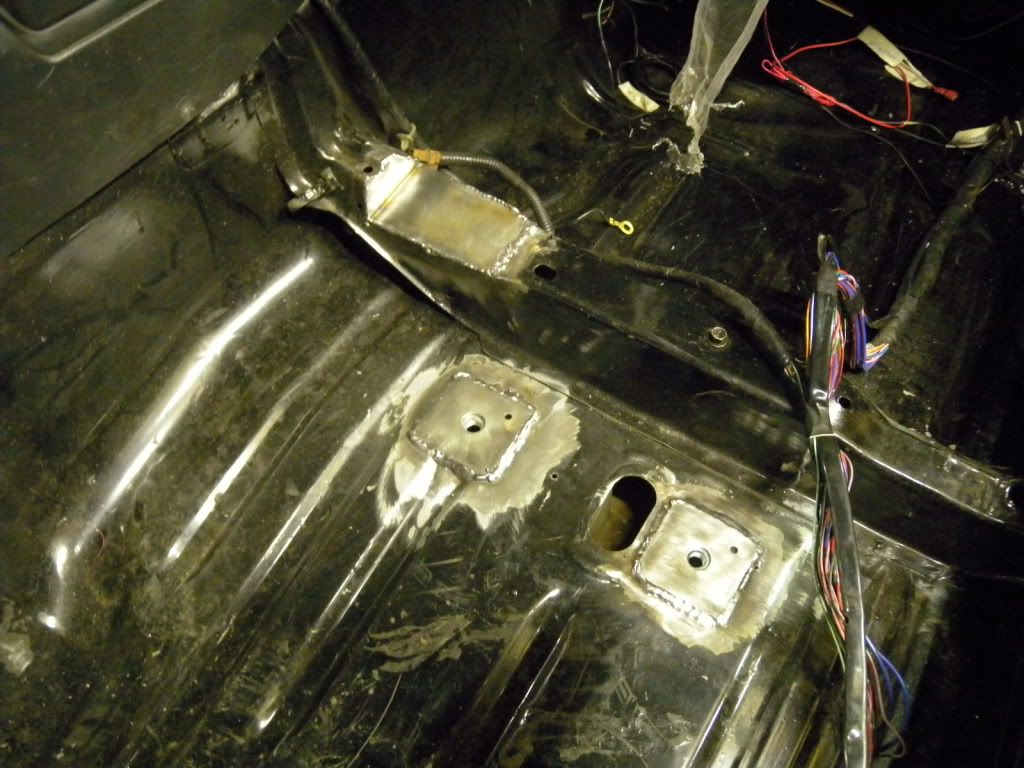
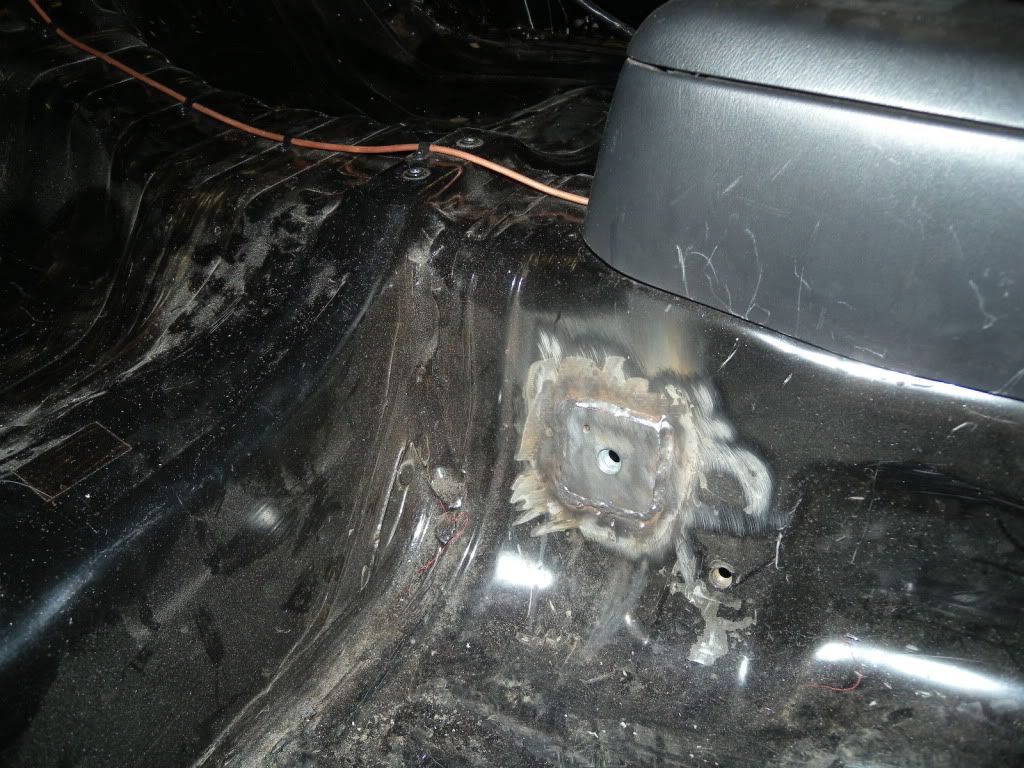
    I finished welding all the mounting points into the floor and rear arches, then cleaned out the car before painting it in Hammerite smooth black. Before refitting the cage again i resprayed it in satin black. Its a real pain getting this cage in and out, hence lots of scratches in the powder coat. So when i refitted it, i wrapped it in bubble wrap.

  2. #82
    Guest Jim_Auto's Avatar
    Join Date
    Aug 2008
    Location
    Cranbrook, Kent
    Posts
    372
    Rides
    0


  3. #83
    Guest Jim_Auto's Avatar
    Join Date
    Aug 2008
    Location
    Cranbrook, Kent
    Posts
    372
    Rides
    0
    Also been swapping the crappy rear brake setup up for skyline brembos with handbrakes

    Crappy old stuff


    Total toilet ebc yellow stuff


    I had read that in order to change the backplate you either had to take the complete knuckle off the or take the drive shaft out. I didnt do either. I just took the hub off.


    I painted up the backplates, fitted them, then fitted the handbrake cables and handbrake assemblies.


    Brembo test fitted. Looks cool!


  4. #84
    Guest Jim_Auto's Avatar
    Join Date
    Aug 2008
    Location
    Cranbrook, Kent
    Posts
    372
    Rides
    0
    Now the cage is in, there is no room for my a post gauge holder. So ive relocated my aux gauges to the centre console. Ive binned my double din Jap minidisc player and fitted a single din, then i made a plate out of ally sheet and put the gauges in it.


    Ive also fitted a brake proportioning valve in the rear brake line. I welded a bracket to the transmission tunnel so that the knob pops through the centre console where the coin holder was. It looks really neat and i can reach it from the drivers seat easily.


    The rear brake line then runs under the centre console to the rear of the car where i welded a bolt to hold the t piece.


    Ive also finally fitted teh rear calipers and the carbotech xp8 pads. Ummmm shiny


  5. #85
    Guest
    Join Date
    Aug 2005
    Location
    Cambs
    Posts
    1,017
    Rides
    0
    Looks good, will be interested to know how well the Carbotechs work- Ive currently got the EBC Yellowstuff pads, mainly through being super cheap! They have lasted fairly well, and havent faded on track- but I would be interested to hear your thoughts

    Tom

  6. #86
    Guest Jim_Auto's Avatar
    Join Date
    Aug 2008
    Location
    Cranbrook, Kent
    Posts
    372
    Rides
    0
    When i had standard discs and calipers, i fitted brand new discs and red stuff, they lasted 1 track day, then cracked up and fell apart and were generally poo. Then i put a set of yellow stuff on. They werent much better. This was about 3 years ago and i think the compounds have changed and ebc are meant to be ok. Im also interested to see how the xp8's are. Not really a fair comparison as ive got much bigger discs and calipers now. Hopefully it will be ok

  7. #87
    Guest
    Join Date
    Aug 2005
    Location
    Cambs
    Posts
    1,017
    Rides
    0
    I didnt explain that too well, I have exactly the same front and rear skyline calipers/disks with the EBC pads, they are fine in terms of temps/fade etc for 20min sessions-

    When is it going top be on track do you think?

    Tom

  8. #88
    Guest clive's Avatar
    Join Date
    Jul 2009
    Location
    chichester, west sussex nr portsmouth
    Posts
    11,439
    Rides
    0
    Dude, gonna order one of those apex cages, sound a pain to fit thou! Lol

    Was wondering if the dash clears the door cards? Oh and the pillar trims etc? You planning on sticking the dash back in? Reason I ask is being I would like to retain a fair bit of the interior... Wanna have a kinda d1 street legal style of car wirh the new 14... full interior strip don't exactly make a compfy car!

  9. #89
    Guest Jim_Auto's Avatar
    Join Date
    Aug 2008
    Location
    Cranbrook, Kent
    Posts
    372
    Rides
    0
    Quote Originally Posted by tomo1 View Post
    I didnt explain that too well, I have exactly the same front and rear skyline calipers/disks with the EBC pads, they are fine in terms of temps/fade etc for 20min sessions-

    When is it going top be on track do you think?

    Tom
    Cool, sounds like it will be a good caparison then. The car should be mot'd in a week. Not sure on teh first track day though. Might try and book a last minute deal.

  10. #90
    Guest Jim_Auto's Avatar
    Join Date
    Aug 2008
    Location
    Cranbrook, Kent
    Posts
    372
    Rides
    0
    Quote Originally Posted by clive View Post
    Dude, gonna order one of those apex cages, sound a pain to fit thou! Lol

    Was wondering if the dash clears the door cards? Oh and the pillar trims etc? You planning on sticking the dash back in? Reason I ask is being I would like to retain a fair bit of the interior... Wanna have a kinda d1 street legal style of car wirh the new 14... full interior strip don't exactly make a compfy car!

    The Apex cage can be fitted with all the interior in place, but it is a through dash cage so you have to cut the dash near the air vents in the corners. I used a bottle jack to push the main hoop legs apart so that the hoop fitted properly on the floor with no carpet in. This meant that the door bars stop the doors from shutting, but ive seen others without that problem. I also cut my dash support bar off at the passenger side just to make it easier to get the cage in and out without scratching it. I then welded the support bar back in after i finished fitting the cage.

  11. #91
    Guest clive's Avatar
    Join Date
    Jul 2009
    Location
    chichester, west sussex nr portsmouth
    Posts
    11,439
    Rides
    0
    Quote Originally Posted by Jim_Auto View Post
    The Apex cage can be fitted with all the interior in place, but it is a through dash cage so you have to cut the dash near the air vents in the corners. I used a bottle jack to push the main hoop legs apart so that the hoop fitted properly on the floor with no carpet in. This meant that the door bars stop the doors from shutting, but ive seen others without that problem. I also cut my dash support bar off at the passenger side just to make it easier to get the cage in and out without scratching it. I then welded the support bar back in after i finished fitting the cage.
    yeah wanted a through dash cage 
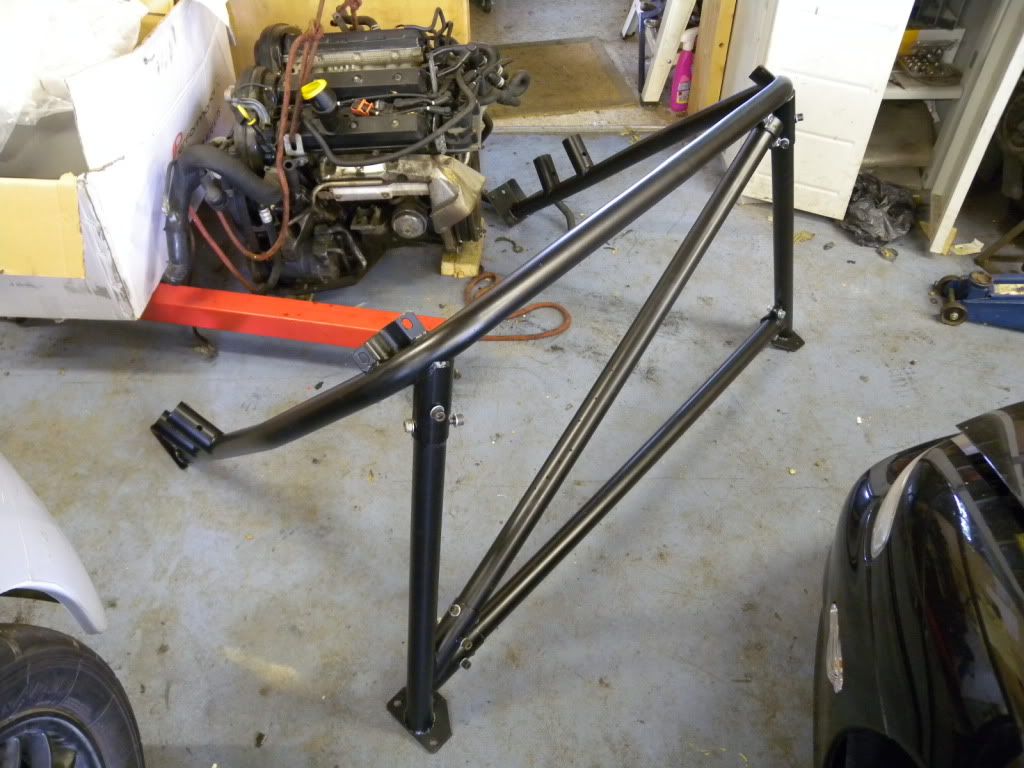
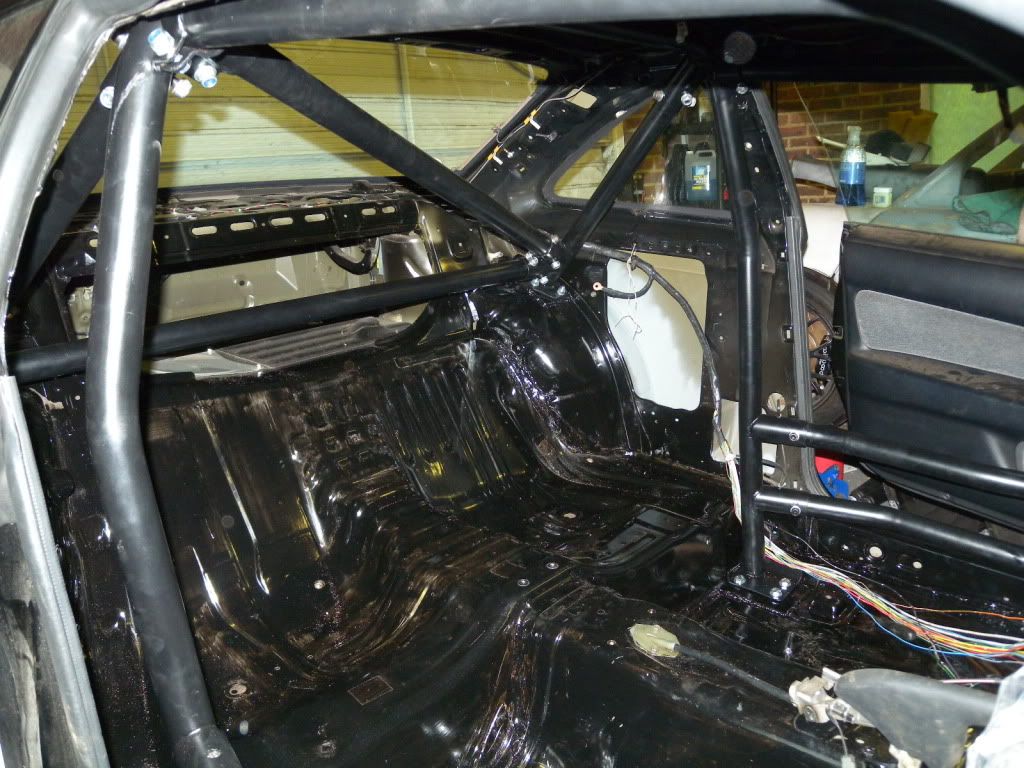
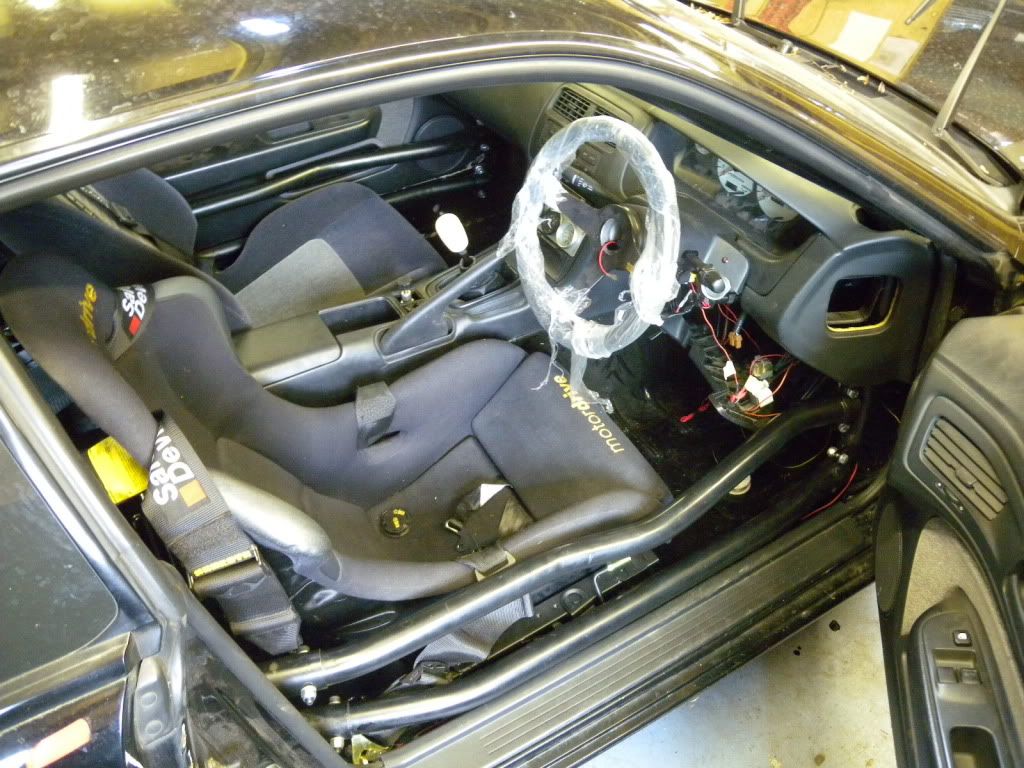
glad to hear it does fit with the interior... luckily im a short arse so it "intruding" into the cabin aint too much of a worry for me!!

    dash support cutting... suppose ill just have to see... not too fussed about scratching it... as lets face it you gonna be marking it most of the time getting in and out!

    cheers for the advice Jim also, you gonna neaten the cuts in the dash?

  12. #92
    Guest Jim_Auto's Avatar
    Join Date
    Aug 2008
    Location
    Cranbrook, Kent
    Posts
    372
    Rides
    0
    Yeah, ive kept the bits i cut out, so may go back and fill in the holes. For the moment im not fussed.

    Ive welded in the harness eye bolt plates. Also i modified a super low seat mount so that i can get a side mount seat in, and have it seriously low. Ive even notched the front lower seat support beam so the seat clears. Now with the seat fitted my head clears the cage even though im 6'1". It took a couple of days of trial and error to get a seat position im happy with, but im real fussy with seating positions.


  13. #93
    Guest Jim_Auto's Avatar
    Join Date
    Aug 2008
    Location
    Cranbrook, Kent
    Posts
    372
    Rides
    0
    Im very near to finishing the car now! Ive relocated the battery to the boot. Ive also fitted a cut off switch behind the drivers seat. This is just for long term isolation, so its behind the drivers seat where it cant accidentally be switched off while the engine is running.


    Ive also had to relocate the boot and fuel flap opening lever. This is now about a foot up the b post behind the drivers seat. Easy to get to now.


    The seats are back in. All the harnesses are fitted and dont rub on anything sharp which is a bonus!


    Heres a pic showing just how low the drivers seat is. Its about 3mm off the floor! Really good driving position.


    Ive also made myself a Nylon gearknob for extra motorsportyness. Feels good and solid.


    I had a bit of a result today. I went to fit my new walbro only to find the car already had one fitted. So ive fitted the new one, and have a good spare just in case. The old pump wasnt actually fitted to the bracket, so im glad i put a new pump in anyway.

    The car now runs. First time its run in around a year. Started on the button. Just got to sort some final wiring, adjust the bypass valve, bleed the brakes, and temporarily fit the overfenders then its mot time!

  14. #94
    Guest Jim_Auto's Avatar
    Join Date
    Aug 2008
    Location
    Cranbrook, Kent
    Posts
    372
    Rides
    0
    Ive bled the brakes, and adjusted the throttle cable so there is no slack.

    Ive also temporarily fitted the overfenders and boot spoiler. They will be coming off after the mot for final fettling and paint. Ive also tinted the rear clusters and centre bar red. So now i have a rear fog light, white reverse, and the indicators still glow orange (just) when illuminated, so it should be ok for mot. Looks much better than the faded burgundy it was before.


  15. #95
    Guest spice_weazle's Avatar
    Join Date
    Oct 2004
    Location
    nottingham
    Posts
    3,483
    Rides
    0
    Looking good. Did you reduce the width of the overs at all?

  16. #96
    Guest Jim_Auto's Avatar
    Join Date
    Aug 2008
    Location
    Cranbrook, Kent
    Posts
    372
    Rides
    0
    Ive just slapped them on temporarily. But the passenger side is pulled in, i may actually need to flex it out again for the tyre to clear, so must be around +25. The drivers side sits further out, but will come in a bit more once i have sanded down the return where the fuel filler flap is. Ill get some pictures up once they are fitted properly.

  17. #97
    Guest DoonanS14A's Avatar
    Join Date
    Jun 2011
    Location
    Tattershall, Lincoln
    Posts
    200
    Rides
    0
    Looks smart mate you got some skills with the welder, enjoyed the last hour or so reading your thread. Looking forward to the finished product

  18. #98
    Guest Jim_Auto's Avatar
    Join Date
    Aug 2008
    Location
    Cranbrook, Kent
    Posts
    372
    Rides
    0
    Thanks Doonan. Got some pics while it was outside and sunny. Ready for its mot now. Just got to adjust the brake light switch and bed the brakes in.


  19. #99
    Guest M.D.'s Avatar
    Join Date
    Jul 2005
    Location
    plymouth
    Posts
    10,631
    Rides
    0
    looks really good mate, that spoiler really suits the style you have gone for

    one thing about the kill switch though mate, im sure that you are only using it as a just in case thing so its not really got to be up with the regs etc, but the idea of them is that they can be easily accessible in case of an accident.
    with it in that position you would need to add a pull cable so that the driver and passenger could reach it from there strapped in seating position with relative ease.

    im not really sure what your speccing this car to suit or whether is just a bit of fun for the track but it may be worth thinking about if you do plan on doing anything further with the car.

  20. #100
    Guest DoonanS14A's Avatar
    Join Date
    Jun 2011
    Location
    Tattershall, Lincoln
    Posts
    200
    Rides
    0
    Its looking well mate, were u planning on running it when its done??

    Im planning on heading to "drift what ya brung" at santa pod when i eventually get mine

Posting Permissions

  • You may not post new threads
  • You may not post replies
  • You may not post attachments
  • You may not edit your posts
  •