This way is very simple when you come to it, I'm getting my bracket laser cut so should only need to turn the hubs down, drill a bolt pcd and tap the brackets
Sent from my HTC Desire HD A9191 using Tapatalk 2

This way is very simple when you come to it, I'm getting my bracket laser cut so should only need to turn the hubs down, drill a bolt pcd and tap the brackets
Sent from my HTC Desire HD A9191 using Tapatalk 2
Originally Posted by TheBigShow

Also I can get uprated pads for the girling calipers
Sent from my HTC Desire HD A9191 using Tapatalk 2
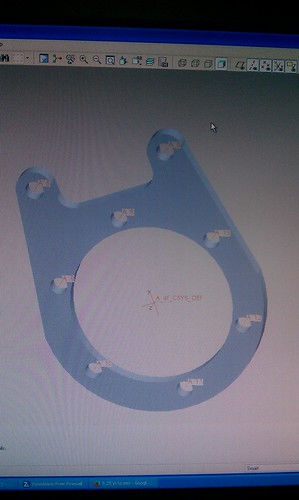
Right i had another play this evening and think ive come up with a final design.
IMAG2878 by darransandwich, on Flickr
I mocked it up and all seems to fit pretty well
IMAG2873 by darransandwich, on Flickr
IMAG2877 by darransandwich, on Flickr
IMAG2875 by darransandwich, on Flickr
IMAG2872 by darransandwich, on Flickr
IMAG2871 by darransandwich, on Flickr
Loving the woodwork
Cheers dude :P, its a skill I need to work on I think
Sent from my HTC Desire HD A9191 using Tapatalk 2
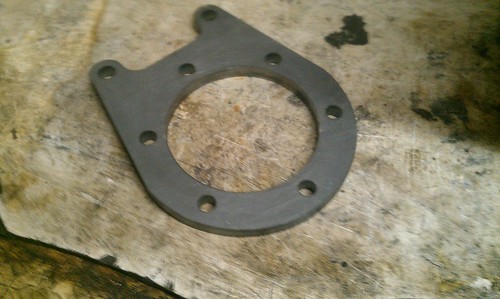
Right time for another little update, i have had my brackets laser cut and all looks good, i need to tap the bracket for the caliper mounts but think ive left it pretty close to the hub, hopefully it will be ok but time will tell when i kill a wheel bearing.
Here is the bracket straight from the laser cutters.
IMAG2881 by darransandwich, on Flickr
Fits nicely in the middle which is a good sign
IMAG2879 by darransandwich, on Flickr
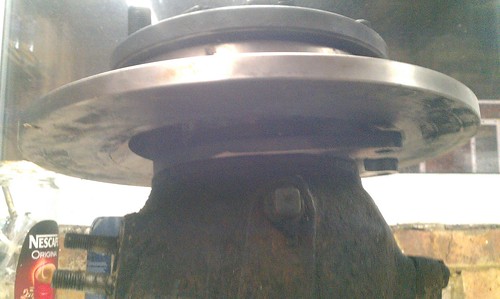
Plenty of clearance for the disc
IMAG2883 by darransandwich, on Flickr
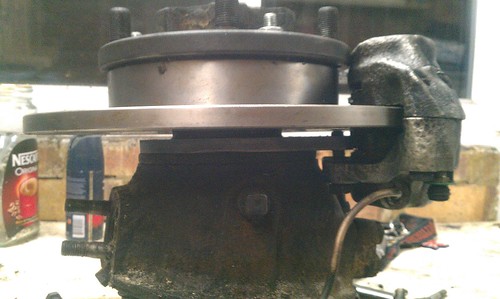
caliper mocked in place.
IMAG2884 by darransandwich, on Flickr
Tomorrow im going to properly turn the hub down and work out the best way to fit the disc to the hub. once thats done i should be about there with this.
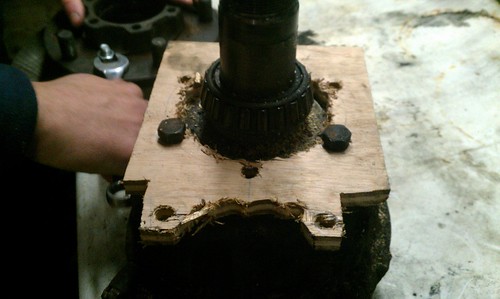
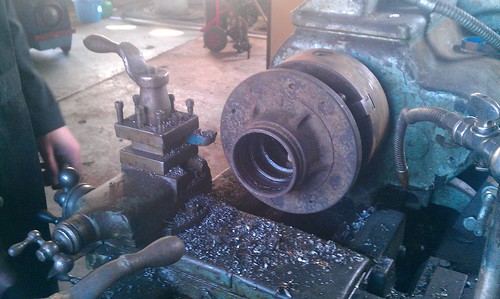
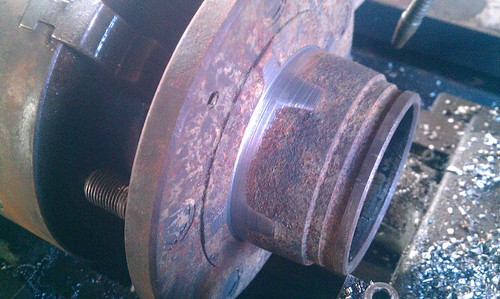
Right so over the weekend i managed to get a little more done on this, first job as to turn down the series hubs so they could take a disc. The biggest difficulty in this is removing the webs on the back.
Theres a before
IMAG2888 by darransandwich, on Flickr
we opped it in the lathe and checked the runout with a dial gauge, impressively we were looking at about plus or minus 6 thou on the casting.
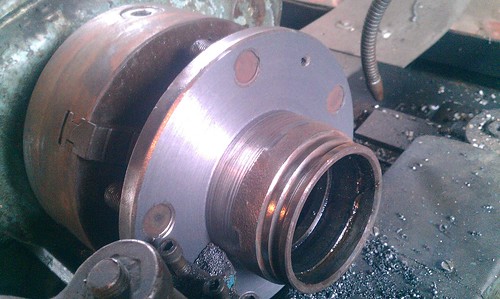
then turned off the ribs.
IMAG2889 by darransandwich, on Flickr
Once this was done the back of the hub had to be faced off.
IMAG2890 by darransandwich, on Flickr
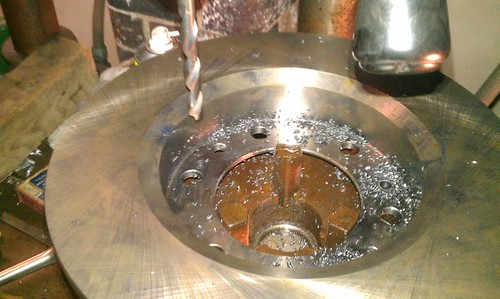
That gave me a pretty good surface to mount the disc so the next job was finding a suitable PCD that would fit both the 6 stud discs and 5 stud hubs.
This was a little trial and error based but we settled on a place that would fit both and drilled the discs out to 5 stud 10mm mounting holes. We then drilledthe hubs to the same pcd and tapped them for an m10 thread.
IMAG2892 by darransandwich, on Flickr
IMAG2891 by darransandwich, on Flickr
Last edited by LED sandwich; 03-02-2014 at 20:33.
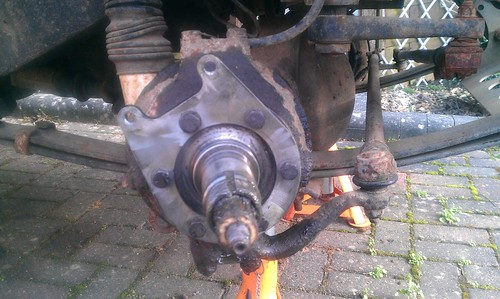
On Sunday i set about mocking them up on my truck, this is where i realised i dropped a bollock and used 1980+ series hubs which means they wont fit my stub axles, i had 1 spare 80+ front stub but will have to modify a rear one to fit for the other side
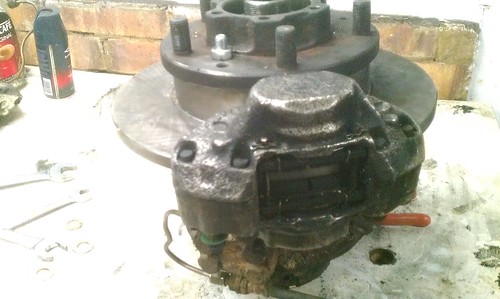
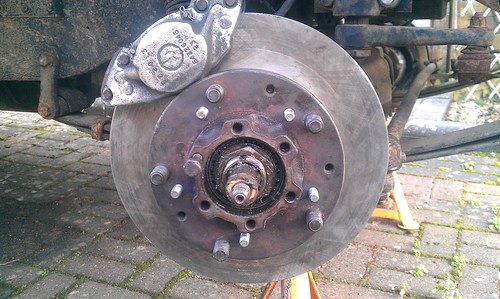
Anywhoo i thought i should mock it all up on the truck, the bracket sat on really well
IMAG2895 by darransandwich, on Flickr
Then i wacked on the hub and the caliper. the offset was a little tight which is a shame so ill add a couple of mm to my bracket design but for now i shaved the caliper a little and fitted it all up
IMAG2896 by darransandwich, on Flickr
I have to say im bloody chuffed with how it looks, i just hope there powerful enough
IMAG2898 by darransandwich, on Flickr
You really should post this on lr4x4 - they love stuff like this. It's not at all like landyzone
Any reason the bracket encompases the whole hub? I would have looked at doing it like a horseshoe shape and use 3 fixings
Yeah ill have a look on LR4x4, i have an account as i saw a few other brake kits on there, people seem very risk averse when it comes to details though.
Mark i did think about only using a couple of holes but figured i would go belt and braces as all the other kits i had seen worked that way. Plus its no extra effort to patter 6 or 3 holes on cad. there is an awful lot of force on the bots though as the stub axle mounts through the same point.
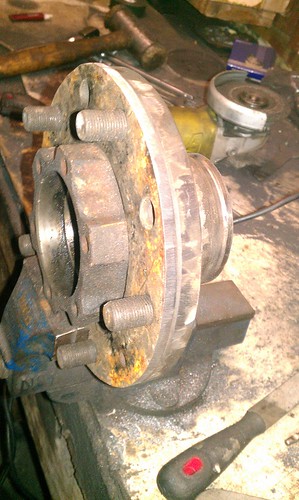
Right well i made a little more progress today, my bearings and bits turned up from paddocks so i got the hubs fitted and managed to track down my missing stub axle.
First i cleaned up the old hubs ready for the new bearings, cut the disc bolts down and thread locked them in place befre building the hubs up on the bench ready to be slotted on.
IMAG2915 by darransandwich, on Flickr
IMAG2916 by darransandwich, on Flickr
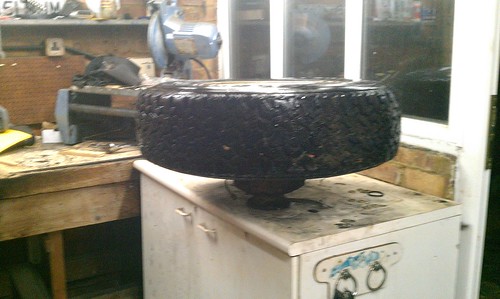
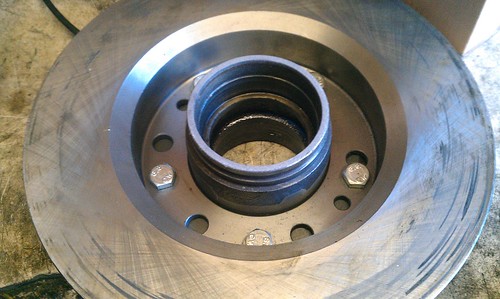
once i had them fitted i tried on the wheels but unfortunately with the caliper centred the rims fouled the caliper. I decided to turn the old ddrums into a spacer but as i couldnt get acess to a lathe this was quite a slow process although they turned out prety well and will do until i can make some better ones.
Thats whats left of the old drum
IMAG2920 by darransandwich, on Flickr
and the spacer on a spare hub.
IMAG2919 by darransandwich, on Flickr
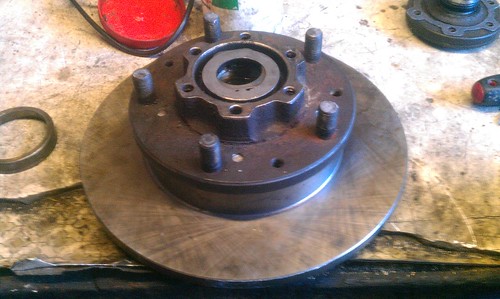
Overall im pretty happy with how it turned out and it will do for now, here is how it looked finished.
IMAG2921 by darransandwich, on Flickr
Right once thats was sorted i test fitted a wheel and it was spot on so i moved on to fitting up the other side before bleeding, i had a bit of a nightmare with the bleeding until i realised i had put the calipers on the wrong sides so the nipples were at the base. Not my brightest moment.
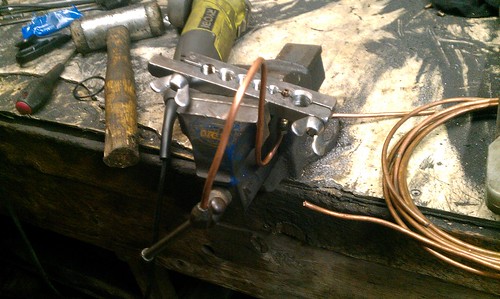
This meant i needed some new hard pipes so i bent up these bad boys.
IMAG2917 by darransandwich, on Flickr
IMAG2918 by darransandwich, on Flickr
once they were flipped they bled up pretty well although i had to clamp the back s off to get a decent pedal. Ill have a look at them one evening this week or at the weekend, if there not the issue ill have to have a think about a bigger master. Does anyone have any suggestions?
Aaron
Right soa little update on this, i adjusted my rear drums re beld and adjusted my master push rod and all seems well now, i have the old girl booked in for an mot on friday so fingers crossed there. My only worry is the fronts seemed to bite pretty early so i may have to fit a bias valve.
Otherwise i have gone over and sorte a few other little issues with the truck.
First up was swapping the indicator stalk over which involved opening the rats nest of a series 3 dash
IMAG2942 by darransandwich, on Flickr
My next issue was my horn had decided to pack in so i changed that our for a new item.
IMAG2944 by darransandwich, on Flickr
Then i had to deal with my headlights as the driver side had reduced to little more than a dull glow.
IMAG2946 by darransandwich, on Flickr
So i sorted the earths out cleaning it up with some emery paper which seemed to do the job.
IMAG2948 by darransandwich, on Flickr
Lastly i had to do a small spot of welding on one of te front dumb irons. i think this is getting to the point where i will need to replace it. the top is solid but the bottom has had a few patches now.
The last couple of jobs i had to do were fix my blower motor and top up my screen wash and i think she is ready for an mot.
I bought a bilge pump off ebay to replace the tired series pump and wired this in. it seems to be working much better now so fingers crossed all will be good for my MOT on friday.
Another quick update i have an MOT, s the old girl is officially back on the road. i couldnt be more chuffed had a faff about including goign through a few fords and the brakes have been pretty good, i think i need to look at the master as there taking 2 pumps to have a high bite although they still work far better than my drums so im pretty dam chuffed. its now time to start looking for some defender calipers so i can make a 4 pot kit
Right well after a lot of quiet i thought it was time for an update, Ive bought some new tyres for the old gilr and decided she needed some TLC for my birthday this year i decided to treat the landy to a few presents.
Ive ditched the front buckets and fitted some deluxe seats to restore the original bench.
My wonderful lady also got me some new heated screens so ive fitted those over this week, just need to make the harnesses up now.
IMG_0021 by darransandwich, on Flickr
I was a bit worried about damagitn the wires and them shorting out so i protected them with some plastic strips and tiger seal
IMG_0022 by darransandwich, on Flickr
IMG_0026 by darransandwich, on Flickr
Once they were all ordered I also decided to go for an X-Eng disk handbrake conversion. i was fed up of stripping, adjusting and cleaining the standard drum handbrake so thought i would treat myself.
IMG_0030 by darransandwich, on Flickr
As you can see its a nicely made bit of kit, took a couple of hours to install.
YYou need to strip the old handbrake, then fit m8 bolts to the drive flanges.
IMG_0035 by darransandwich, on Flickr
Once there in you can fit the centre disc. I wasnt too impressed with the length of bolts supplied so ill either cut them or order some shorter ones.
IMG_0036 by darransandwich, on Flickr
The caliper is actuated by the standard lever via a linkage.
here is the caliper fitted up i need to trial it now tosee if the settings are right.
IMG_0037 by darransandwich, on Flickr
Thats as far as i got today
Aaron
Good to see some progress with this
1998 Nissan 200sx s14a , 2000 std 5 speed with nismo supercoppermix clutch bn6 Sapphire Blue
ha ha yeah, its been quiet a while. im gonna order all the bits to make a rear disc kit up next. hoopefully that will sort the pedal travel, them im gonna stick devent front pads in to give it some bias.
 Posting Permissions

 Reply With Quote